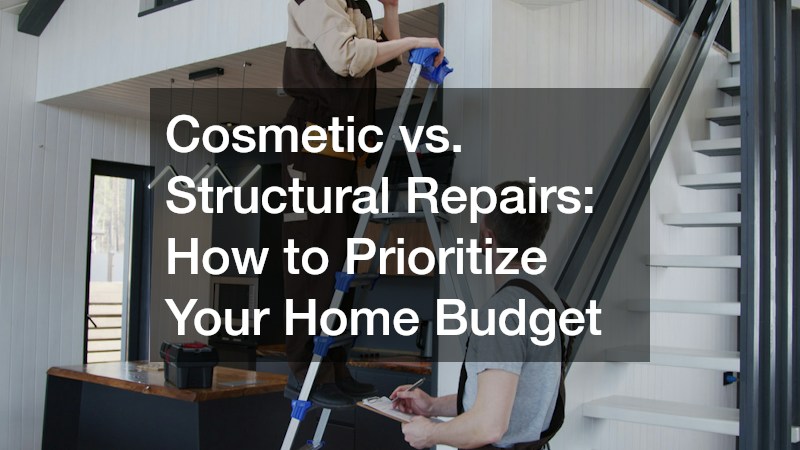
Every homeowner eventually stands in the middle of a room holding a notepad, a calculator, and a finite renovation budget, torn between two competing impulses. On one side sits the desire to fix what you see every single day—dated oak cabinetry, scuffed floors, faded exterior trim, or a cramped entryway. On the other side sit the unglamorous, behind-the-scenes realities of homeownership: an aging electrical panel, a soft spot in the subfloor near a bathroom, a leaning outdoor ledger board, or subtle hairline cracks along a basement wall.
Flipping the order of those priorities is one of the most expensive mistakes a homeowner can make. Installing gleaming stone surfaces, fresh drywall, or luxury wall coverings over unresolved moisture leaks, sagging framing, or overloaded wiring almost guarantees that you will end up tearing out brand-new finishes just to reach the underlying problem later. Conversely, approaching renovations in a logical, disciplined sequence ensures that every dollar you spend protects your property’s long-term integrity before adding visual polish.
Defining Structural Integrity vs. Cosmetic Appeal

Separating Load-Bearing and Code-Safety Fixes From Surface Updates
To allocate a home improvement budget wisely, start by separating projects into two distinct categories: structural and safety essentials versus cosmetic enhancements. Structural work involves the foundational bones that hold your house upright, keep weather out, and protect occupants from physical harm—including foundation walls, sill plates, floor joists, roof trusses, load-bearing headers, subflooring, and code-mandated fall protection. Cosmetic upgrades, by contrast, refresh surface appearances without altering how the building carries weight or operates, such as interior paint, cabinet hardware, decorative trim, and light fixture swaps.
It is equally important to recognize that certain everyday architectural features straddle both categories. For example, replacing a wobbly, loose, or non-compliant stair railing might feel like a minor visual touch-up, yet fall hazards on interior staircases and exterior steps represent a major residential safety risk. Any project that prevents structural failure, water intrusion, fire hazards, or physical injury belongs firmly in your top priority tier regardless of how simple it looks on paper.
Evaluating Hidden Mechanical Systems Before Closing Up Walls
One of the biggest financial traps during remodeling is sealing up walls, ceilings, or floors before verifying the health of hidden mechanical systems. Before spending money on fresh plaster, ceramic tile, or built-in millwork, inspect galvanized steel water pipes prone to pinhole corrosion, cast-iron drain stacks, ductwork seals, and outdated electrical wiring.
Older homes frequently still rely on 60-amp or 100-amp service panels, ungrounded two-prong outlets, or legacy cloth-insulated wiring that cannot safely support modern induction ranges, heat pumps, and home office loads. Bringing in licensed electrical contractors to evaluate panel capacity, install Ground-Fault Circuit Interrupter (GFCI) and Arc-Fault Circuit Interrupter (AFCI) protection, and run dedicated appliance circuits before closing up drywall eliminates the nightmare of cutting holes into freshly painted walls six months later.
Using the “Water, Safety, Structure, Aesthetics” Triage Rule
Whenever two or more home projects compete for the same pool of money, run each item through a four-step triage filter from highest to lowest urgency:
- Stop active water intrusion: Roof leaks, failing flashing, clogged foundation drains, and slow plumbing drips cause exponential damage every week they go unaddressed.
- Eliminate immediate life-safety hazards: Faulty wiring, missing smoke or carbon monoxide detectors, unstable handrails, and gas exhaust leaks take precedence over every visual upgrade.
- Stabilize structural framing and core systems: Sagging floor joists, deteriorating sill plates, failing HVAC equipment, and aging water heaters secure the livability and insurable condition of your property.
- Execute high-impact cosmetic upgrades: Once the envelope, safety systems, and structural bones are sound, invest confidently in cabinetry, countertops, flooring, paint, and landscaping.
Securing the Exterior Envelope and Entryways First
Stopping Roof, Flashing, and Siding Moisture Intrusion Early
Your home’s exterior envelope—the roof, gutters, siding, windows, and foundation drainage—acts as a continuous shield against rain, snow, wind, and humidity. Even a tiny gap in step flashing around a chimney or a missing section of drip edge allows rainwater to wick behind siding and saturate oriented strand board (OSB) sheathing. Left unchecked for a single rainy season, trapped moisture breeds wood-decay fungi, ruins batt insulation R-values, and compromises load-bearing wall studs.
Before budgeting for interior living room makeovers, walk the perimeter of your house during a steady rainstorm. Confirm that gutters capture roof runoff without overflowing, downspouts discharge water at least six to ten feet away from foundation walls, and window caulking remains flexible rather than cracked and brittle. Spending a few hundred dollars on flashing and drainage corrections early routinely prevents five-figure structural framing repairs down the road.
Upgrading Compromised Entry Doors and Weather Seals
Entryways sit right at the intersection of building envelope protection, home security, and curb appeal. Over decades of seasonal humidity swings and daily slamming, exterior wooden doors can warp out of square, leaving daylight visible along weatherstripping edges and allowing wind-driven rain to rot the subfloor threshold beneath the sill plate.
When an entryway lets conditioned air escape or shows soft, spongy wood along the bottom jamb, investing in professional front door installation delivers immediate practical and visual returns. A properly flashed, insulated fiberglass or steel entry door installed with a sloped composite sill and airtight perimeter seal lowers heating and cooling loss, strengthens deadbolt security, and immediately modernizes the front facade of the home.
Inspecting Ledger Boards, Footings, and Joists on Outdoor Living Spaces
Outdoor living structures endure constant exposure to rain, ultraviolet sunlight, and freeze-thaw cycles, making regular structural checks essential before spending money on patio furniture, outdoor kitchens, or decorative stain. Beneath raised decks, inspect the metal ledger board bolted to the house framing—improperly flashed ledgers are the single most common cause of catastrophic deck collapses.
Check every joist hanger for rusted nails, probe support posts near ground level with a screwdriver to detect hidden moisture rot, and shake perimeter guardrails firmly to verify post-to-rim-joist connections remain tight. Addressing structural framing, flashing, and footing stability first ensures your outdoor gathering space stays safe for decades before you invest in composite surface boards or lighting.
Prioritizing Kitchen and Living Area Upgrades Without Overbuilding
Fixing Subfloor Sagging and Plumbing Rough-Ins Before Ordering Millwork
Kitchens and main living areas deliver high daily enjoyment and strong resale appeal, which is why homeowners naturally want to prioritize them early. However, because kitchens concentrate heavy appliances, water supply lines, drain stacks, and electrical circuits inside a compact footprint, structural prep must always precede finish work.
Before ordering a single cabinet box or slab of stone, check the kitchen floor with a long spirit level. Older homes often exhibit floor dips caused by undersized joists, notched framing from past plumbing repairs, or settled support posts in the basement below. Sistering deflected floor joists from underneath and installing fresh tongue-and-groove plywood subflooring creates a dead-flat, rigid foundation—preventing cabinet doors from racking out of alignment and keeping heavy countertops from cracking under uneven stress. Simultaneously, replace aging shut-off valves and relocate sink drain rough-ins while subfloors and wall cavities remain open.
Deciding Between Refacing Existing Boxes and Investing in Built-To-Fit Storage
Once subfloors, framing, and rough utilities are verified sound, you can make smart, budget-conscious decisions about cabinetry—typically the largest single line item in a kitchen budget. Evaluate the structural condition of your existing cabinet boxes honestly before defaulting to a full tear-out:
- When painting or refacing makes sense: If your existing cabinet carcasses are built from solid plywood with sturdy face frames, clean interiors, and a functional layout that already works well for your cooking habits, replacing worn doors, upgrading to soft-close concealed hinges, and applying a catalyzed lacquer finish delivers a dramatic visual transformation at roughly half the cost of new cabinetry.
- When a full rebuild is the smarter investment: If particleboard boxes are swollen from past sink leaks, drawers bind on failing tracks, or awkward corner dead-zones waste valuable storage space, investing in custom cabinets built to your exact ceiling height and workflow eliminates wasted inches and adds lasting structural durability.
Pairing Durable Work Surfaces With Verified Base Support
Work surfaces take more daily heat, moisture, and impact than almost any other interior finish, making material choice critical to long-term value. While laminate and butcher block offer budget-friendly warmth for starter remodels, engineered quartz and dense natural stone surfaces resist staining, scorching, and knife scratches for decades.
Because thick stone and quartz slabs weigh fifteen to twenty pounds per square foot, they demand level, solidly anchored base cabinetry with proper overhang support brackets around breakfast bars and dishwashers. Schedule professional countertop services only after base cabinets are shimmed dead-level, sink basins are on-site for exact undermount templating, and range or cooktop cutouts are confirmed against manufacturer specs.
Choosing Smart, High-Durability Flooring Across High-Traffic Rooms

Leveling Subfloors and Resolving Moisture Issues Before Laying Planks
Flooring ties an entire main level together visually, yet laying new planks or tile over an unprepared subfloor guarantees squeaks, separated locking joints, and voided manufacturer warranties. Before selecting surface materials, walk every room listening for board movement and checking for dips exceeding three-sixteenths of an inch over a ten-foot span.
Drive construction screws through loose plywood into floor joists to eliminate squeaks, sand down high plywood seams, and pour self-leveling underlayment over concrete slabs where needed. In basements and ground-level rooms built on concrete, tape a clear plastic sheet tightly to the slab for forty-eight hours to check for trapped moisture condensation—resolving foundation grading or installing a proper vapor barrier before laying finished floors prevents mold and adhesive failure underneath.
Comparing Waterproof Rigid-Core Planks Against Hardwood and Tile
Selecting the right flooring material for each zone balances upfront cost, moisture resistance, and realistic family wear:
- Solid and engineered hardwood: Remains the timeless benchmark for living rooms, dining rooms, and primary bedrooms, offering authentic grain warmth and the ability to be sanded and refinished decades later—though standing water in kitchens or mudrooms can still cup wood planks.
- Porcelain tile: Delivers unmatched waterproof longevity for bathrooms, laundry rooms, and high-traffic entryways, provided subfloors are stiffened with cement backer board or uncoupling membranes so grout lines never crack.
- Rigid-core luxury vinyl: Modern vinyl flooring products—particularly stone-polymer composite (SPC) planks with thick commercial wear layers—combine 100% waterproof cores, realistic embossed wood textures, and superior scratch resistance against heavy dog claws and dropped kitchen utensils at a fraction of hardwood installation costs.
Sequencing Flooring Last and Vetting Local Installation Crews
Timing matters just as much as material selection. Always schedule finished flooring installation near the very end of an interior renovation—after drywall sanding, ceiling painting, cabinet setting, and heavy appliance deliveries are finished—so dropped tools, paint splatters, and rolling dollies do not gouge brand-new planks.
When hiring installers, compare detailed written proposals from established local flooring businesses rather than relying solely on per-square-foot material pricing. Verify that each quote explicitly includes subfloor flatness prep, moisture testing, door-jamb undercutting, transition moldings, and a written workmanship warranty covering seam separation or buckling.
Budgeting for Perimeter Security, Fencing, and Curb Appeal

Repairing Perimeter Boundaries for Pets, Children, and Property Value
Once your home’s roof, drainage, mechanical systems, and primary interior living spaces are secure, turn your attention to exterior perimeter boundaries and yard functionality. While decorative landscaping beds can wait comfortably until next spring, a leaning, rotted perimeter fence often crosses from cosmetic annoyance into practical necessity when you have young children, energetic dogs, or a backyard swimming pool requiring code-compliant barrier latches.
Traditional pressure-treated pine or cedar fencing requires recurring power washing, staining, and board replacements as ground moisture rots posts at the soil line. Upgrading deteriorating boundary lines to modern vinyl fencing eliminates annual painting and termite vulnerability while maintaining crisp, clean neighborhood curb appeal through decades of sun and rain.
Maintaining Driveway Access Hardware and Automated Entry Systems
For properties equipped with enclosed driveways or gated side yards, mechanical entry hardware is another area where timely maintenance prevents larger structural expenses. Sagging gate hinges, stripped drive gears, or misaligned safety photo-eye sensors can force gates to jam half-open—leaving your property unsecured or trapping vehicles inside the driveway during morning commutes.
Rather than waiting for a strained motor to burn out completely or replacing an entire wrought-iron or composite gate assembly, scheduling prompt gate opener repair to recalibrate limit switches, lubricate rollers, and replace worn control boards restores smooth, reliable security at a modest fraction of full replacement cost.
Prioritizing a home renovation budget does not mean ignoring the visual upgrades that make a house feel warm, personal, and inviting—it simply means putting those finishes in the right order. Protecting your home against water intrusion, eliminating life-safety hazards, and verifying structural framing, electrical capacity, and subfloor flatness first guarantees that every aesthetic upgrade you install afterward stands on a solid, lasting foundation.
Start this weekend by walking your property from the roofline down to the basement with a simple notepad. Separate urgent moisture, safety, and structural repairs from your cosmetic wish list, obtain itemized bids for the foundational work first, and move forward knowing your budget is building true, lasting value in every room.